Getting started with testing in Checkly
Checkly unites E2E testing and monitoring in one monitoring as code (MaC) workflow. Ideally, this workflow consists of the following steps:
- You code your checks using our JS/TS based CLI alongside your application code.
- You test your checks locally, or inside your CI/CD pipeline to make sure they run reliably against your staging and production environments.
- You deploy your checks to Checkly, so we can run them around the clock as monitors and alert you when things break.
Check out this video for a quick explainer:
You can unite E2E testing with monitoring in multiple ways with Checkly. You might be a Terraform shop, or just configure your checks in the web UI first. To help you pick your own journey, we will discuss the core principles below.
Test Sessions
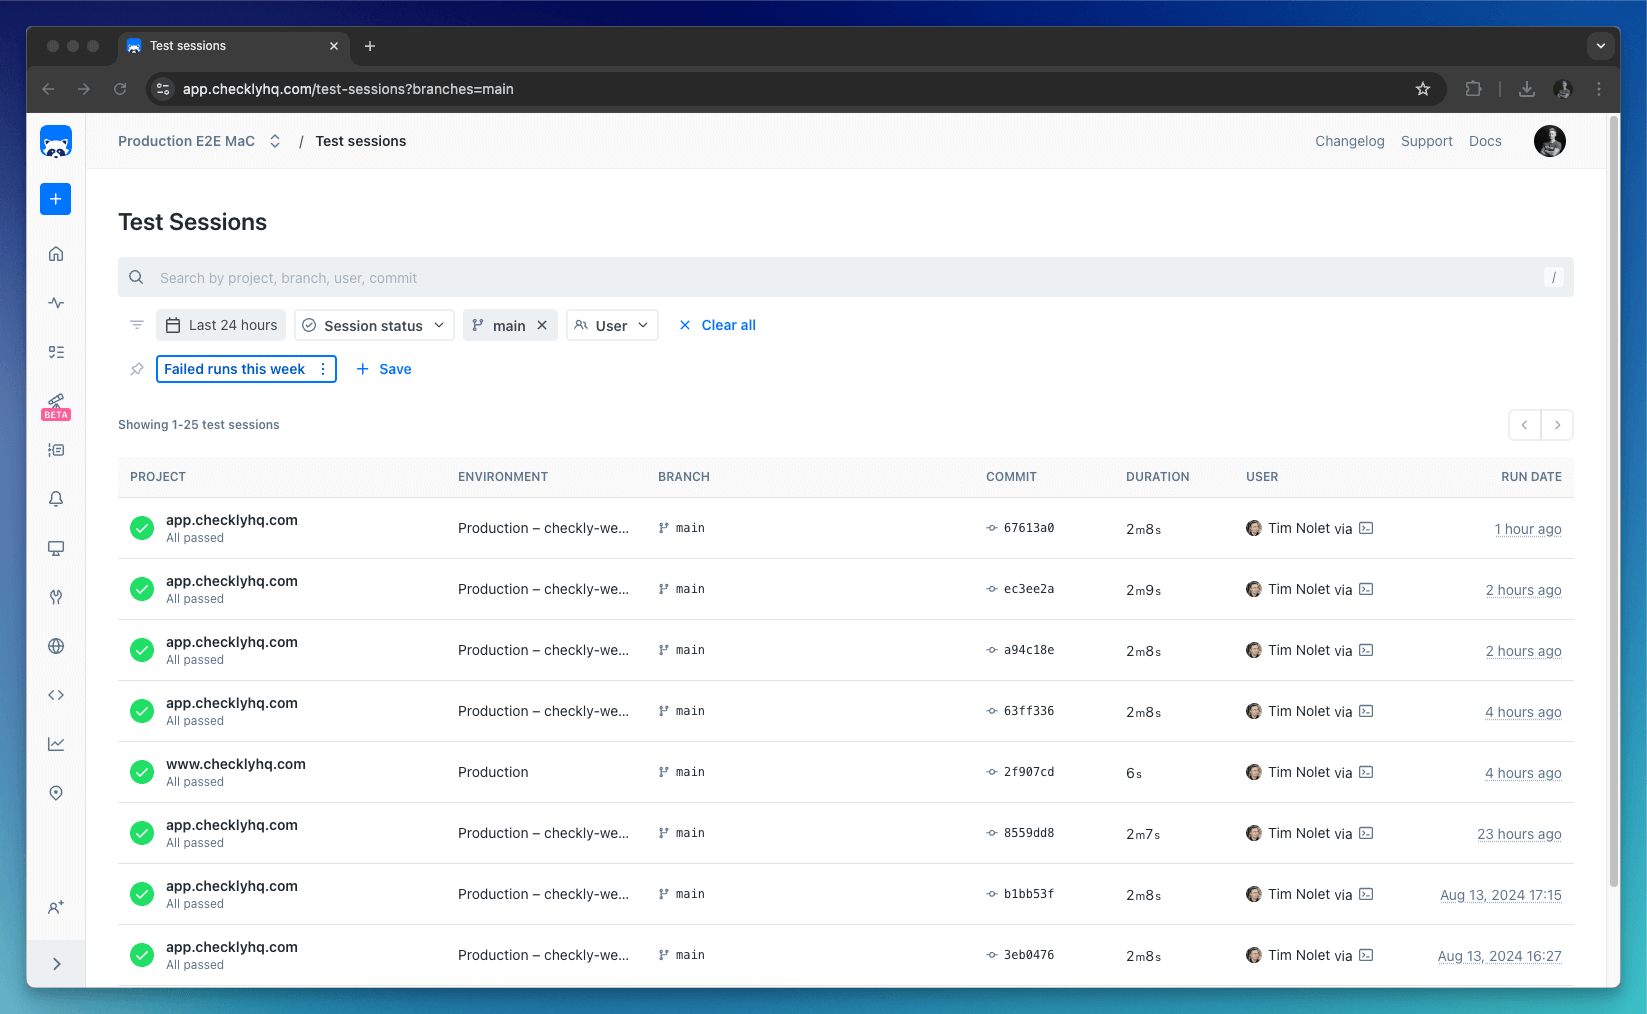
Regardless of how you run / trigger your test runs, every batch of test runs is recorded as a test session and displayed in your test sessions page.

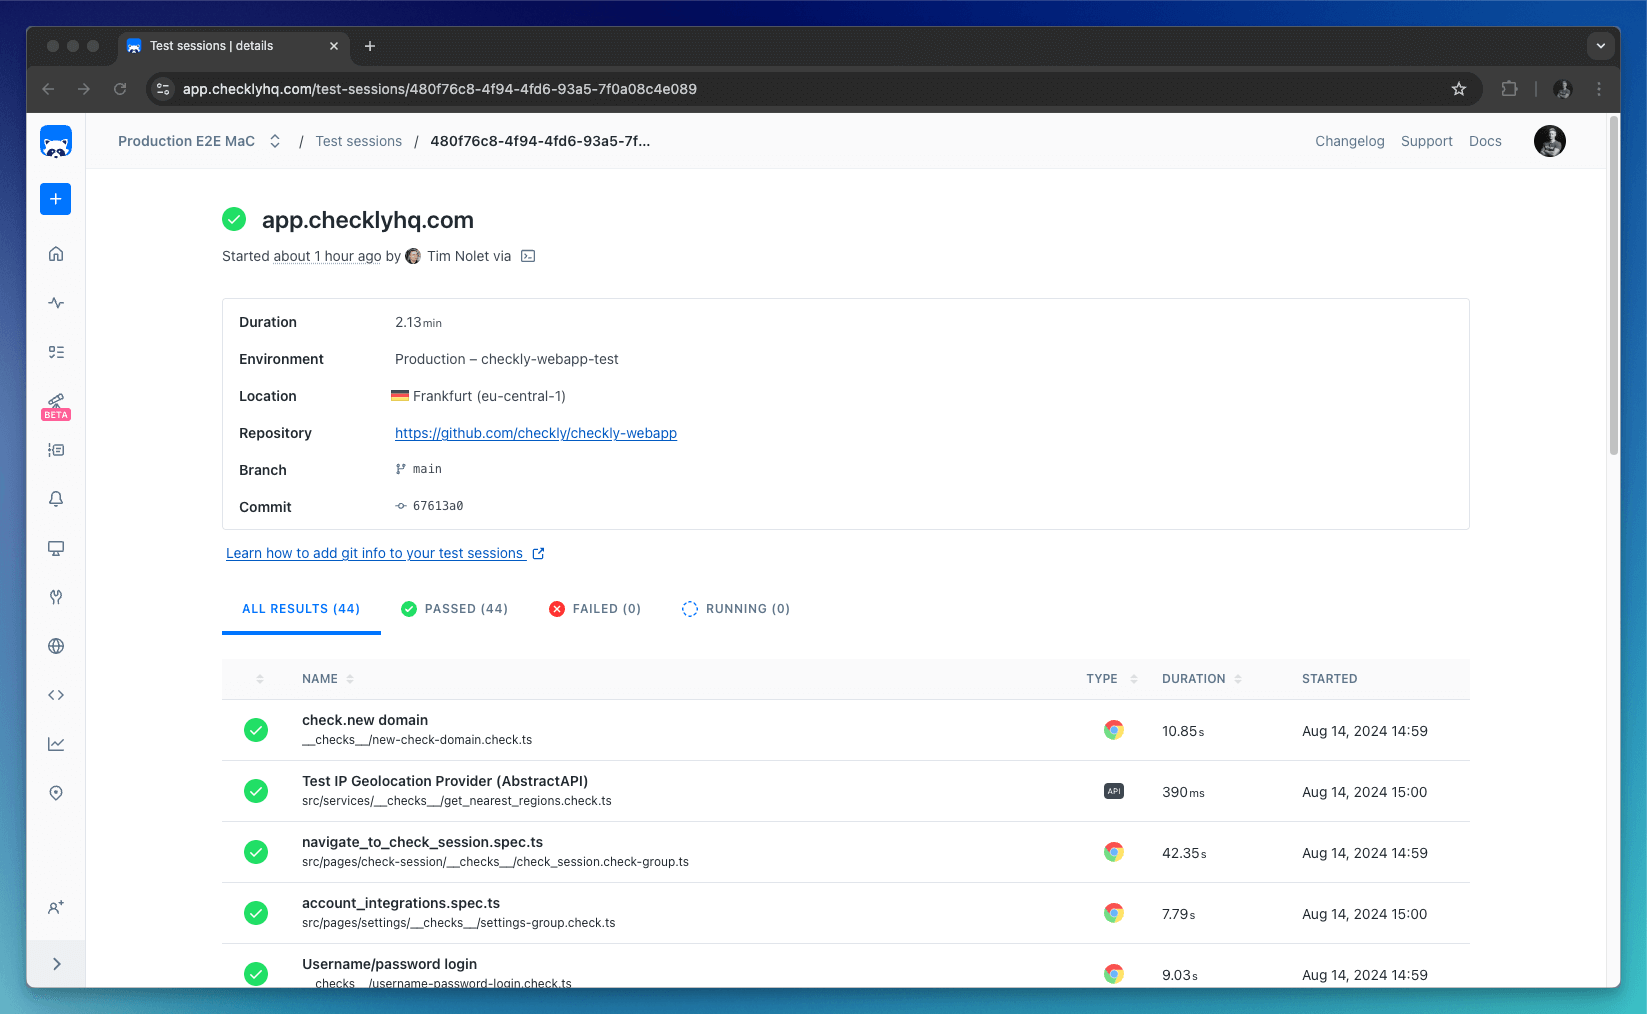
The test session overview provides insights into where a test session was triggered from and who triggered it.

While test session git details are automatically detected you can also configure them by setting environment variables.
| item | auto | variable | description |
|---|---|---|---|
| Repository | false | repoUrl in checkly.config.ts or CHECKLY_REPO_URL |
The URL of your repo on GitHub, GitLab etc. |
| Commit hash | true | CHECKLY_REPO_SHA |
The SHA of the commit. |
| Branch | true | CHECKLY_REPO_BRANCH |
The branch name. |
| Commit owner | true | CHECKLY_REPO_COMMIT_OWNER |
The committer’s name or email. |
| Commit message | true | CHECKLY_REPO_COMMIT_MESSAGE |
The commit message. |
| Environment | false | CHECKLY_TEST_ENVIRONMENT |
The environment name, e.g. “staging” |
Read more about using git with the CLI
For each test session, we record all logging, videos, traces, screenshots and other telemetry. This specifically powerful
when using our @playwright/test powered browser checks.
Searching and filtering
You can use search and filtering to find a specific test session quickly. The free text search supports the Project, Environment, Branch, Commit and User columns. The minimum required length of a search string is 3 characters. Note that special characters are excluded from the search query; e.g., searching for /main will generate the same result as searching for main.
The branch and user filters will suggest branches and users from recent test sessions. To find additional options use the search in the filter drop-down.
Commonly used filters can be saved as a quick filter. Quick filters are user account-specific. To share a quick filter with a colleague, activate it and share the URL.
Testing with the CLI
The preferred way to achieve a full monitoring as code workflow is to use the Checkly CLI. This workflow uses the best
practices from standard testing frameworks like Playwright and Jest and extends them so you can deploy your checks
to Checkly’s global infrastructure and run them as monitors.
In a nutshell, the CLI gives you two powerful commands: test and deploy.
After setting up your first checks inside your repo, you can run them using the test command,
npx checkly test --record
This runs your checks on our global platform, reports the results in your terminal and records a test session.
Running 5 checks in eu-west-1.

src/__checks__/group.check.ts
  ✔ Homepage - fetch stats (43ms)
src/__checks__/home.check.ts
  ✔ 404 page (7s)
  ✔ Homepage (7s)
src/services/api/api.check.ts
  ✔ Homepage - fetch stats (50ms)
src/services/docs/__checks__/docs-search.spec.ts
  ✔ docs-search.spec.ts (11s)

5 passed, 5 total
After validating your checks are correct, you deploy your checks to Checkly, turning them into monitors. You can add alert channels like email, Slack, Pagerduty etc. to alert you when things break.
npx checkly deploy
Integrating into CI
Your checks should live in your codebase and managed as any other application code, making full use of code reviews, versioning, and your general software development lifecycle.
Using the CLI, you can run your test commands from your CI/CD pipeline and target different environments like staging and
production. You can then only deploy your checks once you are sure your build is passing and your deployment has no regressions.
 GitHub Actions
Run the Checkly CLI from GitHub Actions, export summary reports and integrate with mono repos
 GitLab CI
Run the Checkly CLI from GitLab CI pipelines, using separate e2e-test and deploy jobs.
 Jenkins
Run the Checkly CLI from a Jenkins pipeline using a Jenkinsfile.
Triggering test sessions via the CLI
If you are not quite ready to store your checks as code inside your codebase, you can still use the Checkly CLI to trigger
test sessions using the npx checkly trigger command.
npx checkly trigger --record --tags=production
The above example trigger command operates on Checks already deployed to / created in Checkly tagged with “production”
and records a test session.
There are some tradeoffs to be aware of when comparing trigger to test:
- Using
triggeryou do not get the benefit of the code-first approach: no versioning, no code reviews. - However, the
triggercommand works for any scenario, regardless of how you create your checks (web UI, Terraform, API, etc.)
See the full docs on the trigger command
Triggering test sessions via vendor integrations
You can trigger test sessions using our Vercel and / or GitHub Deployments integrations.
These integrations work based on webhooks triggered by deployment events in either vendor’s platforms. In general, this is a great way to get started, but less flexible and powerful than the “full” monitoring as code approach.
Last updated on November 21, 2024. You can contribute to this documentation by editing this page on Github